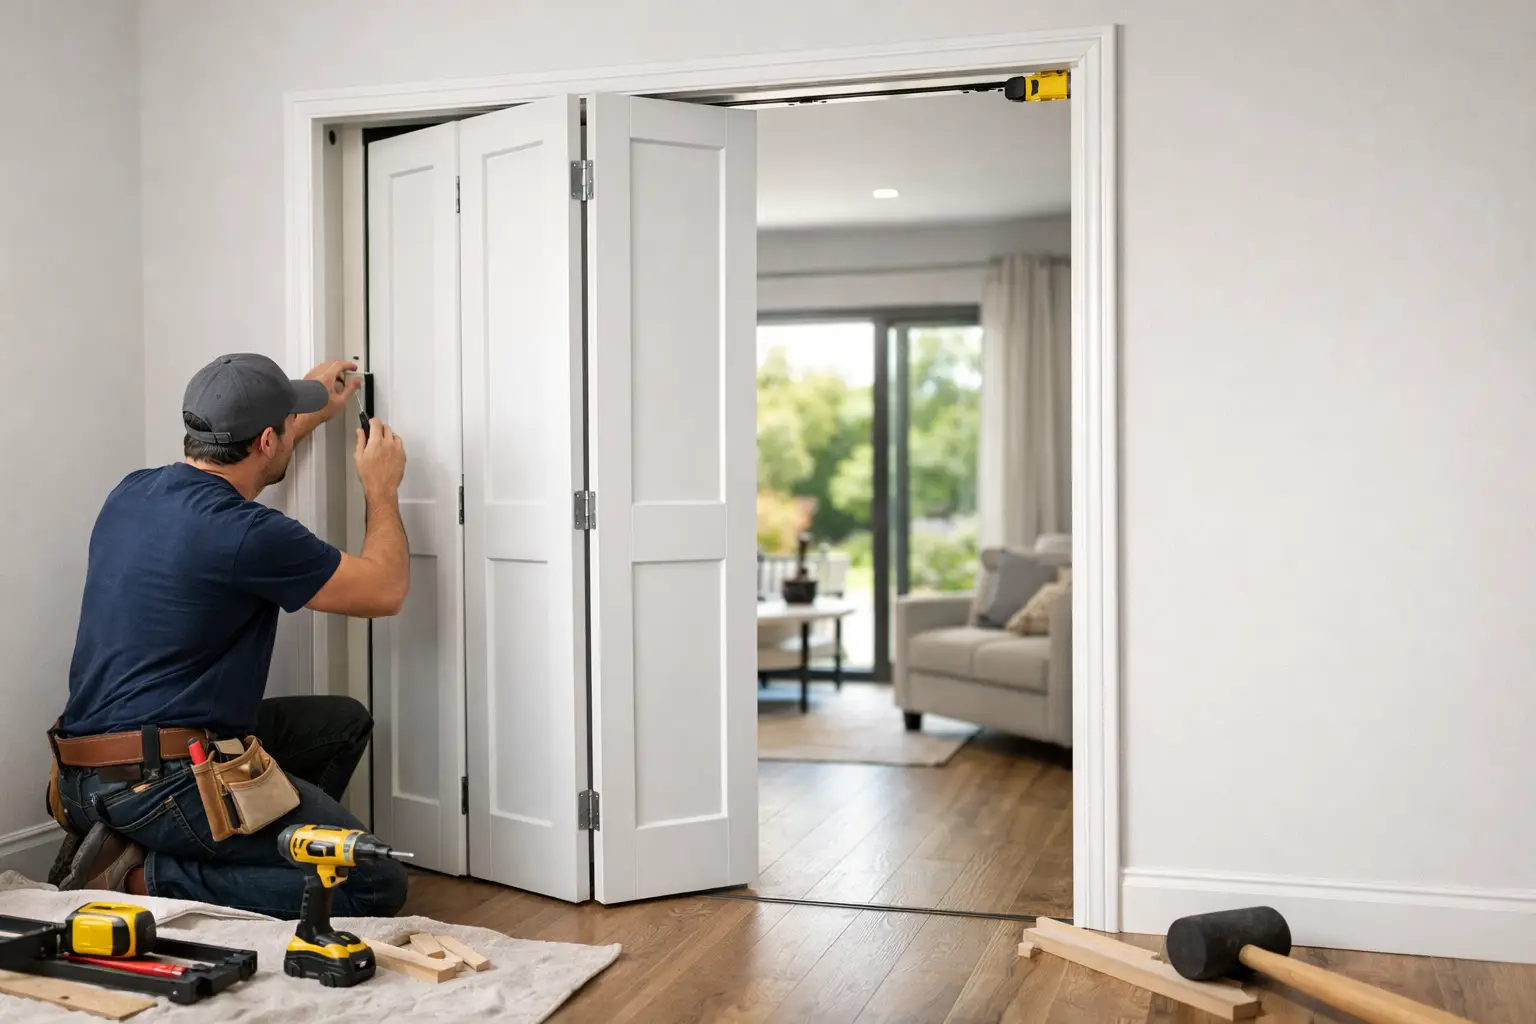
A bifold door should fold neatly, glide without resistance, and close with even gaps. When it rubs on the jamb, drags across flooring, or leaves one panel sitting proud of the other, the issue is usually not the door itself. It is the preparation and adjustment behind it. Knowing how to fit bifold doors properly starts with accepting that a few millimeters can determine whether the finished result feels refined or frustrating.
Bifold doors are a practical choice for wardrobes, laundries, pantries, room dividers, and compact internal openings. They give you wider access than a hinged door without requiring the same swing clearance. However, their moving parts make accurate fitting essential. A level track, plumb jamb, correctly sized opening, and well-adjusted pivots all work together to create a durable, smooth operation.
Before You Fit Bifold Doors, Check the Opening
Do not order or cut doors based only on the nominal opening size. Measure the finished opening after the jamb, flooring, and any relevant trims are in place. Take the width at the top, center, and bottom, then use the smallest measurement. Measure the height on both sides and through the center as well.
Check the opening for square by measuring diagonally from corner to corner. If the two diagonal measurements differ significantly, the opening is out of square. Small variations can often be managed through adjustment, but a badly twisted or uneven opening should be corrected before installation. Trying to compensate with the hardware can lead to a door that operates poorly and wears prematurely.
The jamb also needs to be secure. Loose timber, bowed lining boards, or fixings that move under pressure will affect the track and pivot positions. This is particularly relevant in renovated homes, where older openings may look straight until measurements reveal otherwise.
Allow for finished floor height. Carpet, thick underlay, tile, engineered timber, and transitions between rooms can all change the available clearance. A bifold door that fits during rough-in can start catching once flooring is installed.
Choose the Right Door and Hardware System
Not every bifold system is designed for the same job. Lightweight hollow-core doors may suit a linen cupboard, while solid timber, shaker-style, or glazed panels need hardware rated for their weight. Using light-duty hardware on a heavy door may cause sagging, noisy movement, or failure at the pivot point.
Most internal bifold doors use a top track with a spring-loaded guide or hanger, plus pivot brackets at the top and bottom on the jamb side. Some systems also include a floor guide. Always use the hardware supplied or specified for the door system, rather than mixing components from different brands.
Before starting, lay the door panels flat on protected supports and inspect their finish. Identify the top, bottom, pivot side, and meeting edge according to the manufacturer’s instructions. Pre-finished or painted doors deserve extra care at this stage. A clean work surface and careful handling prevent avoidable chips and scratches.
For a typical installation, you will need a tape measure, level, drill, suitable drill bits, screwdriver or impact driver, pencil, combination square, utility knife, and packers or shims. A second person is valuable when lifting wider or heavier door sets into place.
How to Fit Bifold Doors Step by Step
Begin by confirming the door set is correctly sized for the opening. Do not assume a door will fit because its packaging states a standard width. Check the actual dimensions, the required side clearances, and the hardware allowances.
Mark and install the top track
Position the top track according to the hardware instructions, usually centered beneath the head jamb. If it is installed off-center, the door may fold unevenly or bind against one side of the opening. Hold the track in place, check that it is level, mark the screw positions, and pre-drill where required.
Fix the track firmly into solid timber. If the head is not solid, use appropriate fixings or install blocking before proceeding. Do not overtighten screws to the point that the track distorts. Even a subtle bend can interfere with the guide or hanger movement.
Install the pivot brackets accurately
The top and bottom pivot brackets are normally fitted to the same side of the opening. Their alignment matters more than speed. Use a level or plumb line to transfer the top pivot position directly down to the floor or lower jamb area.
Fit the bottom bracket only where it will sit on a stable, flat surface. If the floor slopes or includes a raised threshold, the bracket may need packing or a different configuration. The goal is to keep the pivot line truly vertical. If the top and bottom pivots are not aligned, the door can swing inward or outward as it folds.
Prepare the door panels
Install the pivot pins, guide pins, hinges, and handles in the locations set out by the door manufacturer. Measure twice before drilling, especially on painted, veneered, or timber doors. A misplaced hole is difficult to hide and can compromise the panel’s appearance.
When joining separate panels with hinges, keep them flat and aligned while fitting. The gap between panels should be consistent from top to bottom. Uneven hinge placement can make the folded door sit crooked, even if the track and pivots are perfectly installed.
Hang the door and set the pivots
With assistance for larger sets, locate the bottom pivot into its bracket first, then compress or engage the top pivot into the top bracket or track. Follow the system’s fitting order closely. Forcing a spring-loaded pin or twisting the door into position can damage the hardware.
Once hung, open and close the door slowly several times. At this point, it may not look perfect. That is normal. Most bifold hardware is designed with adjustment built in, and careful tuning is what creates the finished result.
Adjust for Even Gaps and Smooth Movement
Start with the top pivot. Adjust it to establish an even gap between the pivot-side panel and the jamb. Then adjust the bottom pivot to set the door height and ensure the panel is plumb. Small changes are usually enough, so work in short increments and test after every adjustment.
Check the clearance above the floor and along both sides of the opening. A practical internal bifold door needs enough clearance to move without scraping, but not so much that it appears poorly fitted. The meeting edges should align neatly when closed, and the panels should fold together without forcing.
If the door drags on the floor, first check whether the bottom pivot has settled or whether the track is level. Trimming the bottom of a door should be a last resort, especially with hollow-core construction or a factory-finished edge. If trimming is necessary, remove only the minimum material and reseal any exposed timber to protect it from moisture and wear.
If the panels spring open instead of remaining closed, inspect the alignment of the pivots and the placement of any snugger, catch, or guide provided with the system. A door that will not close neatly may also indicate a jamb that is not plumb.
Common Fitting Problems to Avoid
The most frequent mistake is fitting hardware before properly checking the opening. This can turn a straightforward installation into repeated adjustments that never fully solve the problem. Measure the finished opening, not an earlier framing dimension.
Another issue is relying on a single measurement. Openings can taper, floors can rise, and jambs can bow. Measuring in several places reveals these conditions early, when they are easier to address.
Avoid drilling directly into the visible face of the door unless the hardware calls for it. Protect finished surfaces during installation, use the right screw length, and pre-drill pilot holes in timber to reduce the chance of splitting.
Finally, do not judge the installation only when the door is open. Test it fully open, half folded, and closed. Watch for rubbing, listen for clicking or scraping, and check that the door does not pull out of alignment when used normally.
When Professional Installation Makes Sense
A confident DIY installer can fit a standard lightweight bifold door into a square, well-prepared opening. The trade-off changes with custom-sized doors, premium timber panels, larger openings, uneven floors, or detailed architectural trims. In these cases, professional installation protects the product, preserves its finish, and ensures the hardware is adjusted for dependable daily use.
For homeowners renovating across Penrith and greater Sydney, a professionally measured and fitted bifold door can remove the uncertainty around sizing, jamb preparation, hardware selection, and final alignment. It also helps ensure the door complements the surrounding architraves, skirting, and interior design rather than looking like an afterthought.
The best bifold door installation is rarely the one completed fastest. It is the one where the measurements are precise, the hardware is suited to the door, and every panel closes quietly and cleanly for years to come.